I love taking old things that aren't pretty and doing a little work on them and making them pretty. It is even better if I can find something for really cheap and with a little sweat equity, turn it into a cute addition to my home! Here is one of my favorite projects that would be super easy to repeat in your own house.
I found this very cheap (read $10) headboard at a 2nd hand store.
But, I could see it's hidden potential, hiding under a hideous 70's shell! I sanded the head board, then primed it with some Kilz.
Next, I spray painted it in white with a smooth satin finish.
Lastly, I hung it on the wall with some L brackets.
After I made the bed, it looked fabulous!
Cheers! Jaime
Showing posts with label DIY. Show all posts
Wednesday, February 29, 2012
Tuesday, February 14, 2012
I double dog dare ya!
In the old west [and especially on the playground] these were fightin' words.....crafters also have fighting words. They usually come in the form of "Too bad you don't know how to make_______" Or "I wish you could make ________"
As you may remember from my prior post my sewing machine gave me a HUGE feeling of a major power trip. I was Wonder Woman and MacGyver all in one (throw in my iPhone and I could dang near rule the world!) - I was basically just waiting to be dared to make something!
And of course it happened......"Too bad you can't make Christmas Stockings...." :-O Excuse me?!? OF COURSE I can make a silly little Christmas stocking!!! Geesh! I thought you were going to ask me to make something hard! In fact I'm going to the craft store right now for supplies!
So this started my Christmas Stocking adventure.... I literally went to the craft store the same day....bought material, went home and washed it, ironed it (of course my favorite part!) and then stood looking at it...for a long time.....Just how the heck does one MAKE a Christmas Stocking?????
So back to the craft store I went. I purchased a cheap stocking, brought home, and ripped out every seam to use as a guide (or what actual "sewers" would call a "pattern"!)
Then I went to work! Even with a "pattern" it took SEVERAL times to get the shape enlarged correctly...but thankfully I live close to the craft store so if I had to go buy more material so be it! I was dared after all remember?!!?!?!
The first one was for the dog (please do not let this make you think I don't love and care for the dogs in my life! Because I DO!)....it wasn't bad....but I knew it could be better! So I did what every knotty krafter would do....I'm tweaked it and improved it!!!! By the time I had the 3rd one done I would have been willing to let anyone watch my happy dance! I HAD DONE IT!!!!! You can take that dare and drown it in a cocktail! I RULE!
And then I remembered I needed to put a cuff and a loop to hang it by on...... BUT I put on my big girl pants and my pearls and went back to the craft store! I got some $.99 white fat quarters and came back home and went to work!
All in all they turned out GREAT - especially for my first time! I might even get brave enough to make a new batch next year.... ;-D
Materials
Christmas Fabric
Coordinating Fat Quarter for the Cuff (I used white so you could see the names)
Pattern (There is a great one here from Prudent Baby-- we LOVE Prudent Baby)
Pins
Thread
Sewing Machine
Red (or coordinating color) Glitter Paint
Sequence in the same color as your paint
Instructions
1. Wash and Iron material
2. Lay the "pattern" piece on the backside of the material and use a nifty frixion** pen to draw the outline one the material approx. 2 inches bigger than the pattern (because I just got a small cheap sock to tear apart LOL!)
3. then I cut it out and flipped it over to the other side of the material and traced it and cut that out
4. Pin both pieces together inside out and sew 1/4 in seams along the bottom and both sides leaving the top open
5. For the cuff, cut the fat quarter into pieces long enough to go around the top of the sock and then wide enough to be doubled
6. Put the cuff inside the sock pinned it to sew 1/4 in seam and then roll the cuff out.
7. Take red glitter paint and write the first letter big and outlined with large red sequins (using the paint like glue) and then finish the names with smaller letters.
8. Viola! Your stocking is complete!
**Frixion Pens by Pilot are the BEST new invention for quilters and crafters. They completely erase with heat. There is an eraser on the end of the pen which causes friction and erases the mark. You can also use an iron to erase the markings from your fabric, as I learned the hard way! I buy mine at Target, but you can also get them here.
Wednesday, February 1, 2012
the Good, the Bad, and the Scrubbie
When I moved to Wichita 3 years ago, Elaine's mom, Georgia, sent me the BEST HOUSEWARMING GIFT EVER!!!!! Dear readers, I would like to introduce you to The Scrubbie.
What is this Scrubbie I speak of? It is a little piece of crocheted nylon delight that you can use to clean most things in your house. They are especially helpful for cleaning non-stick cookware without scratching the surface. I am not exactly known for my cleaning prowess (come on people, you have seen my car). My Scrubbie lets me get to tough cleaning jobs when I want to, but isn't as abrasive as an SOS or similar pad. Best part about it is that I can put it in the dishwasher and it will clean and sterilize my Scrubbie when I am done.
So, after using the Scrubbies that Georgia gave me (Thanks, Georgia!) for 2 years, I finally decided that I needed to make some myself! So, I asked Georgia very nicely to share her pattern with me. Not only did she share it with me, but she also taught me to crochet!
Georgia's Scrubbies
Materials:
Nylon Netting-- I bought this at the fabric store by the yard. For my first project I bought 3 yards, which should net 10 (ish) Scrubbies.
Crochet Hook Size J
Abbreviations
Ch: Chain
DC: Double Crochet
HDC: Half Double Crochet
St: Stitch
Sl st: Slip Stitch
Instructions:
Before you begin to crochet, cut your netting into strips that are at least 1.5 inches wide. I folded my netting like very long accordion and then cut my strips width wise at the top. Use these strips of netting as the yarn in the following pattern:

Row 1: Ch 5, join with sl st to form ring.
Row 2: Ch 2, 9 hdc in circle, join with sl st to top of ch 2. 10 hdc
Row 3: Ch 3, 2 dc in next st and each st around, dc in joinging st, join with sl st to top of ch 3. 20 dc.
Row 4: Ch 3, 2 dc in next st and each st around, dc in joinging st, join with sl st to top of ch 3. 40 dc. Fasten Off.
![]() |
| The Scrubbie |
![]() |
| Georgia |
So, after using the Scrubbies that Georgia gave me (Thanks, Georgia!) for 2 years, I finally decided that I needed to make some myself! So, I asked Georgia very nicely to share her pattern with me. Not only did she share it with me, but she also taught me to crochet!
Georgia's Scrubbies
Materials:
Nylon Netting-- I bought this at the fabric store by the yard. For my first project I bought 3 yards, which should net 10 (ish) Scrubbies.
Crochet Hook Size J
Abbreviations
Ch: Chain
DC: Double Crochet
HDC: Half Double Crochet
St: Stitch
Sl st: Slip Stitch
Instructions:
Before you begin to crochet, cut your netting into strips that are at least 1.5 inches wide. I folded my netting like very long accordion and then cut my strips width wise at the top. Use these strips of netting as the yarn in the following pattern:

Row 1: Ch 5, join with sl st to form ring.
Row 2: Ch 2, 9 hdc in circle, join with sl st to top of ch 2. 10 hdc
Row 3: Ch 3, 2 dc in next st and each st around, dc in joinging st, join with sl st to top of ch 3. 20 dc.
Row 4: Ch 3, 2 dc in next st and each st around, dc in joinging st, join with sl st to top of ch 3. 40 dc. Fasten Off.
So, thank you Georgia for all of your advice and teaching me the secrets of The Scrubbie! My family thanks you, too (as they all received them as Christmas presents this year).
Cheers, Jaime
Tuesday, January 24, 2012
Christy Rocks!
Christy showed us this the other day. It is fabulous! Seriously, you could spend all day just clicking the button. http://random-tutorial.com
Sunday, January 22, 2012
Peach Brandy (a.k.a. My Adventures as a Moonshiner)
So one day, I was sitting in my office and a colleague came in. We started chatting about canning and the like. He started telling me a recipe to make peach brandy. I knew that I was going to a peach farm with Christy and Jennifer the next weekend, so my ears perked up. After listening to his recipe I had to try it. Readers, it is the easiest thing I have EVER made. Make it for your friend next Christmas and they will think that you are Martha Stewart herself!
To begin head to the peach farm. For you less adventurous types, a local farmers market will do (the grocery store is an option as well, but not nearly as fun!). Pick out the ripest peaches that you can, without being bruised. You want them almost too ripe to eat, but with the skin on the peaches still intact.
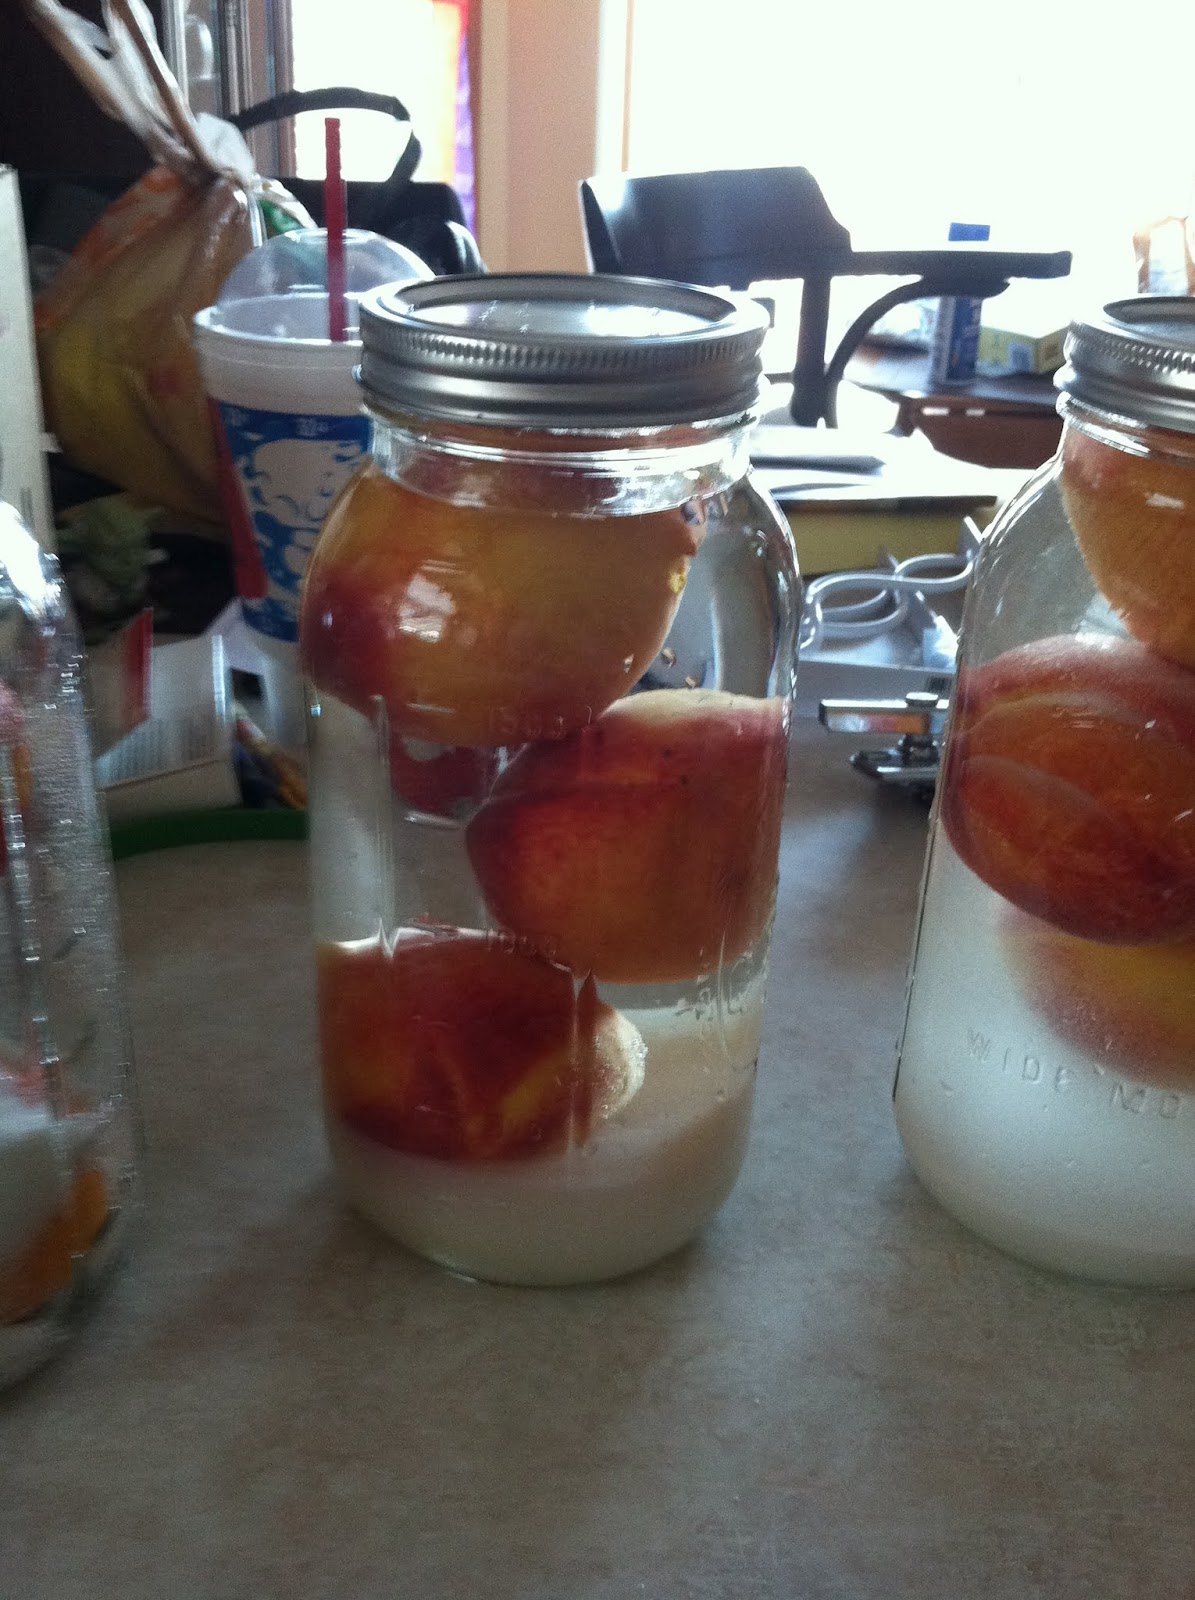
Next bring your peaches home and wash them. Get a gallon jar (mason jar, pickle jar, or sun tea jar). I couldn't find a gallon jar so I used half gallon jars and cut this recipe in half for each jar. Fill the jar with whole peaches as far as you can. Don't cut the peaches, only wash and set them in the jar.
Next add 3 cups of sugar to the jar.
After you add your sugar, get the cheapest vodka that you can find. Go to the market or liquor store, look at the very bottom shelf at the vodka that would give you a hang over for a week and costs less than $6 for 175ml and buy that! Fill the gallon jug with the cheapest vodka you can find all the way to the top.
Now that you have your peaches, sugar, and vodka in the jar, put the lid on tight. This is the hardest part of the process-- put it in a dark, cool place in your house and wait. Wait 6 months. Seriously, 6 months. It will be worth your wait. After 6 months, pull the jug out of the cabinet and use a funnel to fill bottles with your brandy. You may need to strain the brandy through a cheese cloth if the peach skin breaks down in the fermentation process.
I gave mine as Christmas gifts to my Supper Club and some other friends. My family especially LOVED it!
Recipe:
Peaches
3c sugar
175ml vodka
Add peaches, sugar, and vodka to a gallon jar. Put top tightly on jar. Let sit in a cool dark place for 6 months. Strain through a cheese cloth and store in a glass bottle. Enjoy!
To begin head to the peach farm. For you less adventurous types, a local farmers market will do (the grocery store is an option as well, but not nearly as fun!). Pick out the ripest peaches that you can, without being bruised. You want them almost too ripe to eat, but with the skin on the peaches still intact.
Next bring your peaches home and wash them. Get a gallon jar (mason jar, pickle jar, or sun tea jar). I couldn't find a gallon jar so I used half gallon jars and cut this recipe in half for each jar. Fill the jar with whole peaches as far as you can. Don't cut the peaches, only wash and set them in the jar.
Next add 3 cups of sugar to the jar.
After you add your sugar, get the cheapest vodka that you can find. Go to the market or liquor store, look at the very bottom shelf at the vodka that would give you a hang over for a week and costs less than $6 for 175ml and buy that! Fill the gallon jug with the cheapest vodka you can find all the way to the top.
Now that you have your peaches, sugar, and vodka in the jar, put the lid on tight. This is the hardest part of the process-- put it in a dark, cool place in your house and wait. Wait 6 months. Seriously, 6 months. It will be worth your wait. After 6 months, pull the jug out of the cabinet and use a funnel to fill bottles with your brandy. You may need to strain the brandy through a cheese cloth if the peach skin breaks down in the fermentation process.
I gave mine as Christmas gifts to my Supper Club and some other friends. My family especially LOVED it!
Recipe:
Peaches
3c sugar
175ml vodka
Add peaches, sugar, and vodka to a gallon jar. Put top tightly on jar. Let sit in a cool dark place for 6 months. Strain through a cheese cloth and store in a glass bottle. Enjoy!
Subscribe to:
Posts (Atom)